1 Introduction: a quick tour using Conscript
You can follow the steps in this tour to get a fast, high-level introduction to Congame and Conscript:
Creating and testing a minimal study
Creating studies with multiple steps
Interactively collecting data from participants
Uploading and running your study on a Congame server.
This will give you a taste of how the system works. You’ll get a sequence of steps to take to try everything out, but not (yet) the reasoning behind them. When you’re ready, you can start reading the Conscript and The Congame Server sections for detailed explanations of the concepts introduced here.
1.1 First example: the simplest study
The best way to learn is by doing, so let’s do!
To follow along on your computer, first follow the instructions in Installing, Running, and Updating.
1.1.1 Creating a new file
Assuming you’ve installed Racket and Conscript, launch the DrRacket application. Start a new file. Click into the top/main area (the "definitions" window) and change the top line to:
#lang conscript
The first line of every Conscript study program starts with #lang conscript.
1.1.2 Writing the simplest study code
Add some lines to your new program, so it looks like this:
#lang conscript (provide tutorial) (defstep (start) @md{ # The Beginning is the End This is all there is. }) (defstudy tutorial [start --> start])
This code defines a step named start, and a study named tutorial, which starts with a single step and ends with a single step.
We’ll get into the specifics later; but at a high level:
Conscript studies are Racket programs that start #lang conscript.
In Conscript, you can use “@ notation” to intermingle code and text. This is explained further in “Scribble syntax” in Conscript.
Each step is contained in a defstep expression. Within this expression are more expressions that provide the content and functionality for that step. The step shown here uses an md expression to denote text that will be formatted using Markdown.
The steps are tied together into a transition graph using a defstudy expression.
1.1.3 Test-driving the simplest study
To try out your study, you’ll need to upload it to a Congame server and enroll in an instance of the study. The Docker container you set up during the initial installation process provides the Congame server for use in testing.
Open the Docker desktop app and press the play ▶️ button for the congame container.
In DrRacket, save the study you created above as "simple.rkt".
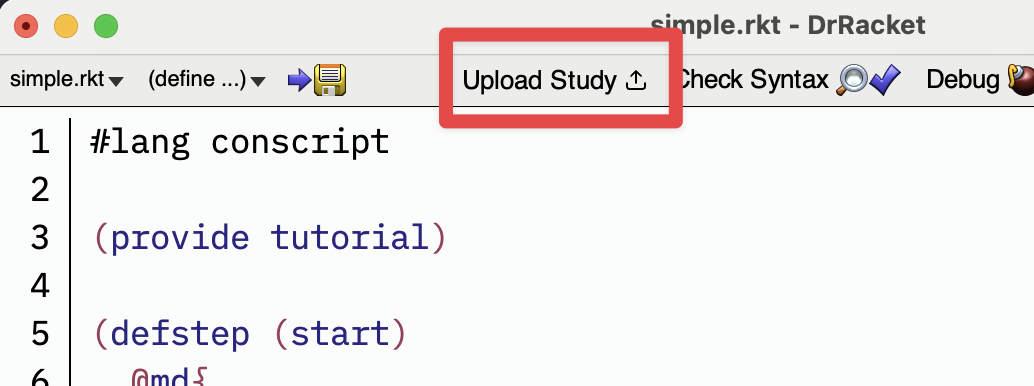
Then click the Upload Study button:
1.1.3.1 Aside: one-time connection setup
The very first time you upload a Conscript study from DrRacket, DrRacket will ask you the address of the Congame server to connect to, and then prompt you to log in on that server.
DrRacket assumes the server you want is at http://localhost:5100 —
If you later want DrRacket to send uploads to a different server, too bad.
Once the login is complete, DrRacket will ask you the name of your study:
DrRacket keeps a cache matching your ".rkt" filenames to study names. You won’t have to re-enter the study name more than once for each file you upload —
until you close and reopen DrRacket.
Enter tutorial as shown, since that’s the name we gave our study in the defstudy expression.
At this point, DrRacket will upload your study. Next time you edit and upload this study, you’ll skip past all these steps and the upload will happen as soon as you click the Upload Study button.
Aside over!
1.1.3.2 Make an instance and enroll
Once your study is uploaded, you should see your web browser open to a page titled Instances of tutorial.
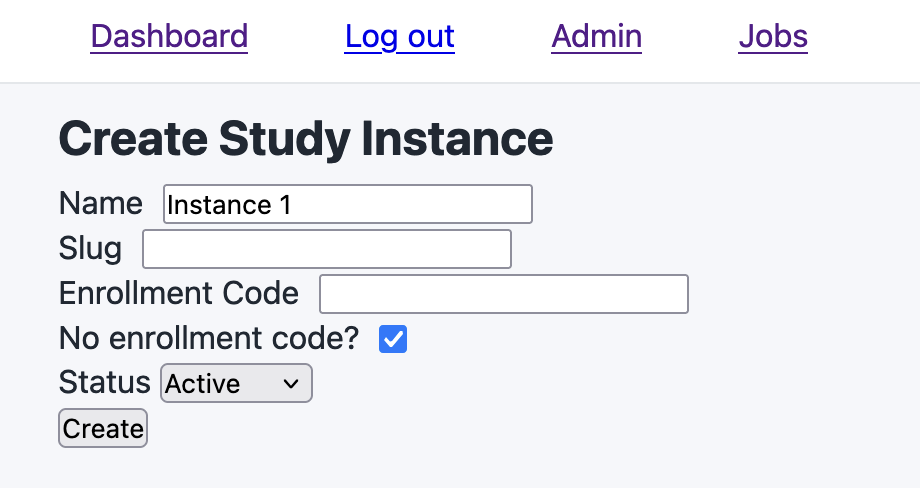
Click on the New Instance button. For now, just fill in a value like Instance 1 in the Name field, and leave the rest of the fields at their default values:

Click Create to create an instance of the study.
You’ll be taken back to the study’s instance list, and this time the new instance will appear in the list.
Go back to the Dashboard (link at top) and you’ll see the new instance listed there.
You’ll also see an Enroll link —
That right there is your first study! The browser is showing you the first and only step of the study: a page with some formatted text.
1.2 Second example: addings steps and getting input
Of course, to be at all useful, a study must collect information. To do that, we need to give participants a way to interact with our study.
Create a new file in DrRacket (click File → New, or File → New Tab according to your preference). Add these lines at the top of your new, empty file:
#lang conscript (require conscript/form0) (provide simple-survey) (defvar first-name) (defvar age)
Conscript studies always start with #lang conscript.
The require statement makes the conscript/form0 module available for use inside our study.
The provide statement is needed to make our study available to the Congame server (we’ll revisit this again below).
After this, we’ve introduced two defvar expressions. Each one defines a new study variable bound to an identifier, in this case first-name and age.
The defvar expression looks similar to “declare a variable” expressions in Python, JavaScript, and other languages. Using defvar tells Conscript that this variable is a key piece of information we want to record from each participant.
Now let’s add steps to our new study. First, we’ll explain to participants what to expect:
(defstep (description) @md{ # The study Welcome to our study. In this study, we will ask for * Your first name * Your age @button{Start Survey} })
This looks similar to the step in our first example study —
Speaking of which, let’s write the next step!
We’re going to add a form with inputs to collect values. First, we define the structure of the form data itself. Add these lines to your study:
(define-values (survey-form on-submit) (form+submit [first-name (ensure binding/text (required))] [age (ensure binding/number (required))]))
Here we give form+submit a list of variables —
As its name implies, form+submit returns two values: a form data structure, and a procedure that is called when the form is submitted. All we need to do for now is capture both of these return values: the enclosing define-values expression binds them to survey-form and on-submit.
Then, we define a helper function that “renders” the form. This function can be named whatever we
want, but it must take one argument —
(define (render-survey-form render-widget) @html*{ @render-widget["first-name" @input-text{What is your first name?}] @render-widget["age" @input-number{What is your age in years?}] @|submit-button|})
Working from the inside out:
The (input-text) and (input-number) expressions generate input boxes where the participant can enter data. There are other expressions that can be used to insert the various other form elements like checkboxes and dropdown lists.
The render-widget expressions (which call the procedure passed in as the first argument to our render-survey-form function) determine how the input widgets will be depicted in the browser, and connects the widgets to the names used for the defvar study variables.
The submit-button expression inserts the button the user can click to submit all the information they have entered into the form.
All the interactive form elements are wrapped in a html* expression to keep them grouped together.
Finally we combine all these things —
(defstep (age-name-survey) @md{ # Survey @form[survey-form on-submit render-survey-form]})
Next, write the final step by adding these lines to the end of your file:
(defstep (thank-you) @md{ # Good job, @first-name Thank you for participating in our survey despite being @number->string[age] years old. })
We’re doing something else interesting here: we’re inserting our variables directly into the text! We’ve told Conscript to record first-name and age in the previous step of the study; in addition to storing those values for later analysis, we can make use of those values while the user is still participating. There are many ways we might want to do this: in this case, we’re simply displaying the values back to the user.
Note that since we used input-number to assign a value to age, we must use number->string to convert that numeric value to text if we want to display it within md.
Finally, we’ll define the study as a whole by tying all the steps together in a transition graph:
(defstudy simple-survey [description --> age-name-survey --> thank-you] [thank-you --> thank-you])
We’ve now told Conscript that our study is named simple-survey, and that it consists of three steps description, age-name-survey and thank-you in that order. Because every step must have a transition, even the last one, we add [thank-you --> thank-you] to tell Conscript that that step simply transitions to itself.
1.2.1 Being a good provider
Before moving on, let’s revisit one small thing from the beginning of this study: the provide statement we added at the beginning.
We added this statement at the top of the file, providing an identifier called simple-survey which hadn’t been defined yet…until we added this defstudy statement just now:
#lang conscript (provide simple-survey) ; …all the other code we added here… (defstudy simple-survey ; … )
The key point to remember: your Conscript study must always place a (provide studyname ...) expression at the top of your file, where studyname is the identifier used in your eventual defstudy expression.}
This line will be needed later when we upload our study to a Congame server. Without it, the server will not be able to access the study bound to the simple-study identifier.
1.2.2 Review: the code so far
Combining all these snippets, the code should look like the below example. Go ahead and save it as "age-survey.rkt".
"age-survey.rkt"
#lang conscript (require conscript/form0) (provide simple-survey) (defvar first-name) (defvar age) (defstep (description) @md{ # The study Welcome to our study. In this study, we will ask for * Your first name * Your age @button{Start Survey} }) (define-values (survey-form on-submit) (form+submit [first-name (ensure binding/text (required))] [age (ensure binding/number (required))])) (define (render-survey-form render-widget) @html*{ @render-widget["first-name" @input-text{What is your first name?}] @render-widget["age" @input-number{What is your age in years?}] @|submit-button|}) (defstep (age-name-survey) @md{ # Survey @form[survey-form on-submit render-survey-form]}) (defstep (thank-you) @md{ # Good job, @first-name Thank you for participating in our survey despite being @number->string[age] years old. }) (defstudy simple-survey [description --> age-name-survey --> thank-you] [thank-you --> thank-you])
1.2.3 Test-driving the age study
Once again, click the Upload Study button in DrRacket, and (if prompted for the study name) enter the name of this new study, simple-survey.
If you receive errors at this point, double check that the contents of "age-survey.rkt" exactly match the contents of the example file shown above. In particular, check that the top line says #lang conscript and that the (provide simple-survey) expression is present in the file.
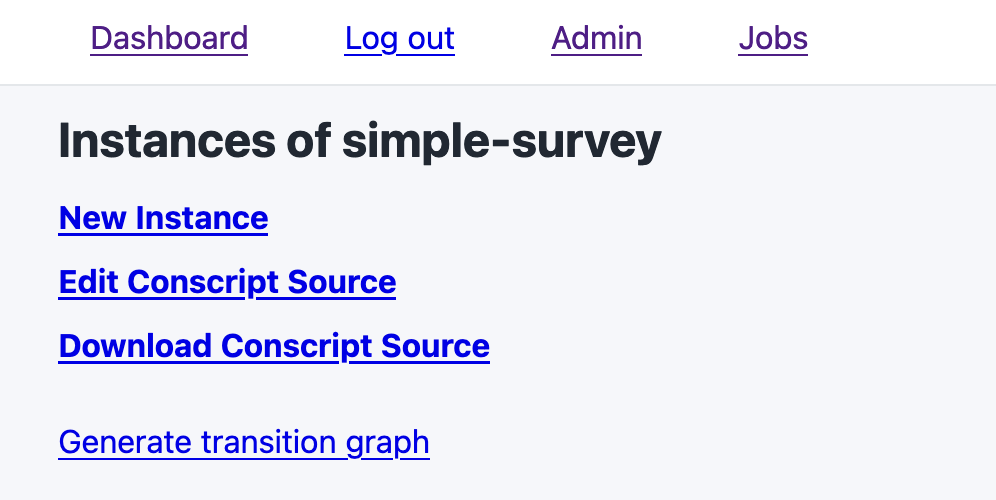
If all goes well, you’ll be taken to a page titled Instances of simple-survey:

As before, click on New Instance and enter a name for the survey instance —
Now that you’ve published your study and created an instance for it, you can click on the Dashboard link and see the new instance listed there.
You’ll also see a link titled Enroll — click it!
You should see your web browser open with a page that looks roughly like this:
Your first name
Your age
Click the Start Survey link/button to proceed to the next step in the survey:
Enter some values in the textboxes and click “Submit”.
For fun, try entering a non-numeric value in the “age” text box. What happens when you click Submit?
This will bring you to the final step in the study:
That’s it! You can see that the values you entered in the previous step have carried over and are being used in the text displayed in this step.
When you upload and run the study on the Congame server, values collected and stored in variables created with defvar and similar forms get recorded in the server’s database and comprise the results of the study.
You’ve now observed a few more basic concepts first-hand:
You use defvar to define the discrete pieces of information you want to collect from study participants.
You can create multiple steps for your study through repeated use of defstep.
Within steps, you can insert input controls like input-text inside a form to collect info from participants, and save that info into your defvar variables.
You use the defstudy form to define your study as a whole. Within that form, you use --> to tell Congame how the steps connect to each other in sequences.
It’s possible to create much more advanced studies than those we have built so far: studies with conditional branching, a variety of form controls, timers, randomizing assignments, etc. But what you have seen so far gives you the basic framework.
As long as the study instance is in “active” status, other people who log into this same study as participants will see this same study instance and the Enroll link on their dashboard, allowing them to complete the study as well.
1.2.4 Reviewing collected responses
Finally, let’s take a look at what happens to the responses submitted by study participants.
Once you’re done with the study, navigate back to the dashboard. Then click on the Admin → simple-survey (in the list of studies), then on the Age Instance 1 link.
All the way at the bottom, you’ll see a section titled Participants — and you’ll be the first one:

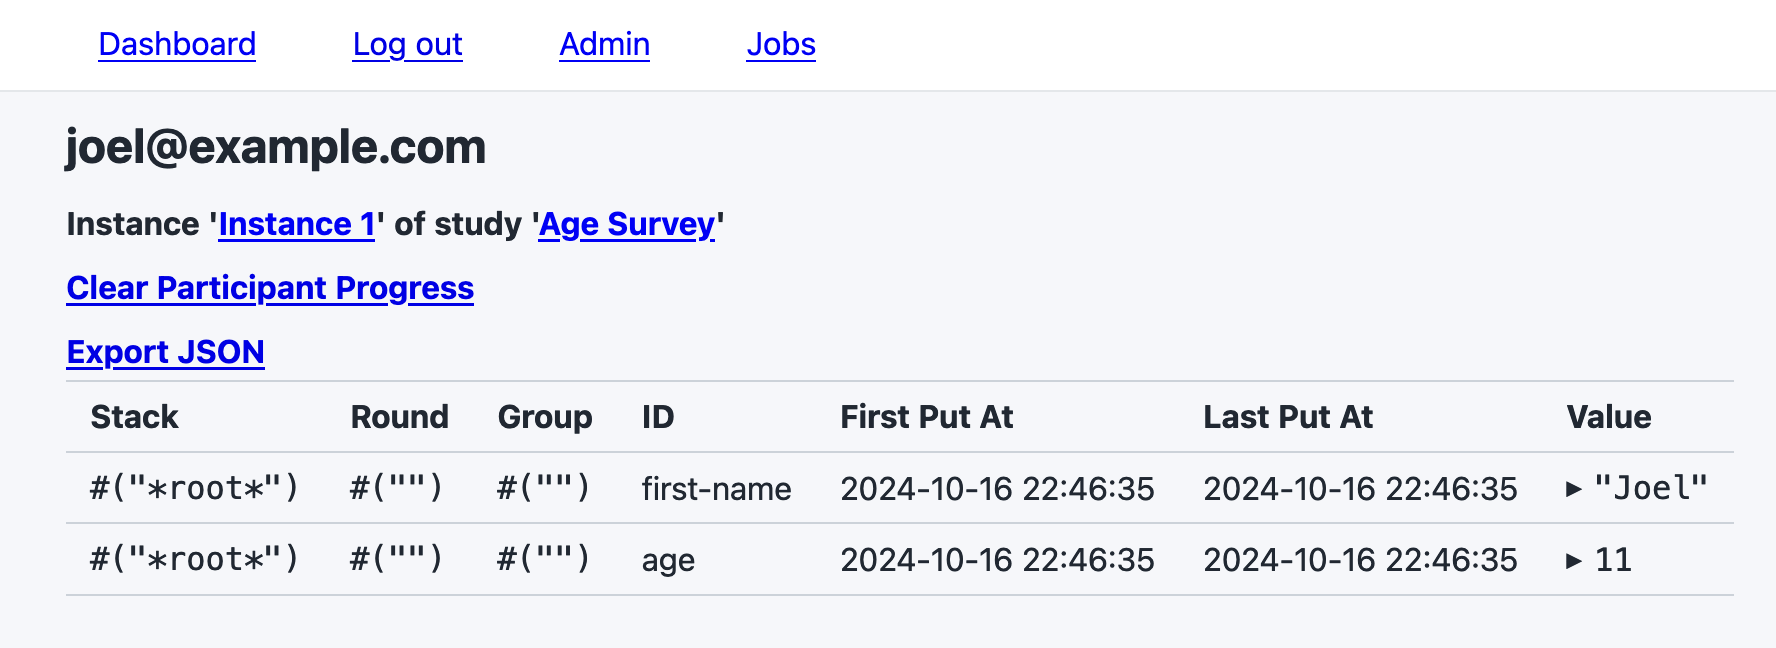
The number under the Participant ID column is a link — go ahead and click on it. You’ll see a detailed listing of your responses to the study:

1.3 Wrapping it up
At this point, you’ve seen all of the essential features of creating studies in Conscript, testing them on a Congame server, and collecting some sample responses.
From here, you should check out the Congame basics: An overview, and then, when you’re ready, dive into the more detailed Conscript guide.

